How to convert PDF to image
This guide will show you how to use Ahead PDF to Image Converter step by step.
Before you start, please download, install and launch Ahead PDF to Image Converter.
Step 1. Download and Run Ahead PDF to Image Converter
Download Ahead PDF to Image Converter and install it on your PC. Then launch the program.
Step 2: Add PDF files
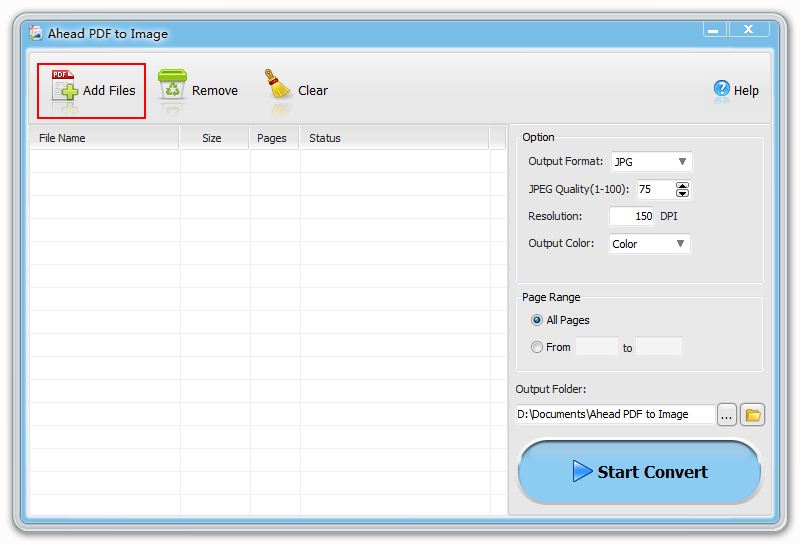
Click the “Add Files” button to import PDF files to the file list. If you want to import a batch of files, press the “ctrl” key to select.
Note:
You can click the “Remove” button in the toolbar to remove a selected file or click the “Clear” button to remove all the pdf files from the program.
Step 3: Setup Options
Setup output image file options and page range.
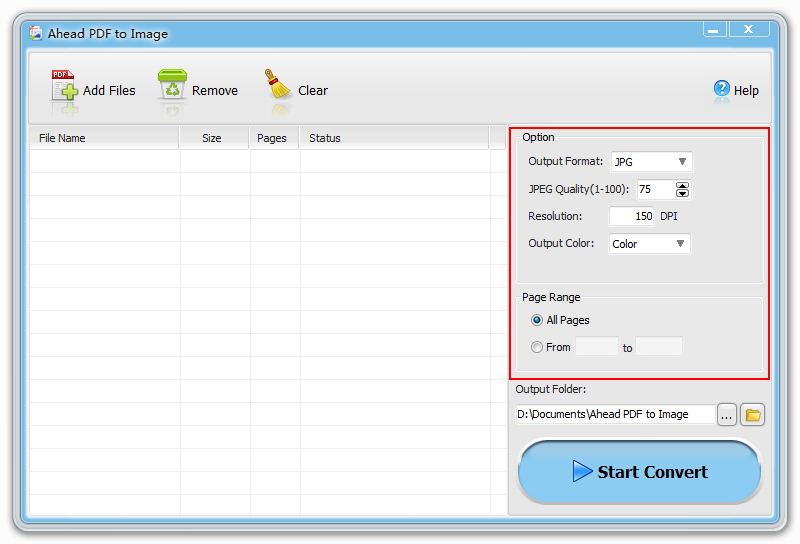
1. Output Format: select an output image format.
2. Jpeg Quality(1-100): set quality in generated JPG files.
3. Resolution: set resolution in generated image files.
4. Output Color: set output color (color or gray).
5. TIFF Compression: set compression method (for TIFF image only)
6. Save each page as separate image file: save each page as separate image file. (for TIFF image only)
7. Page Range: set page range for the output image files.
Step 4: Set the Output folder
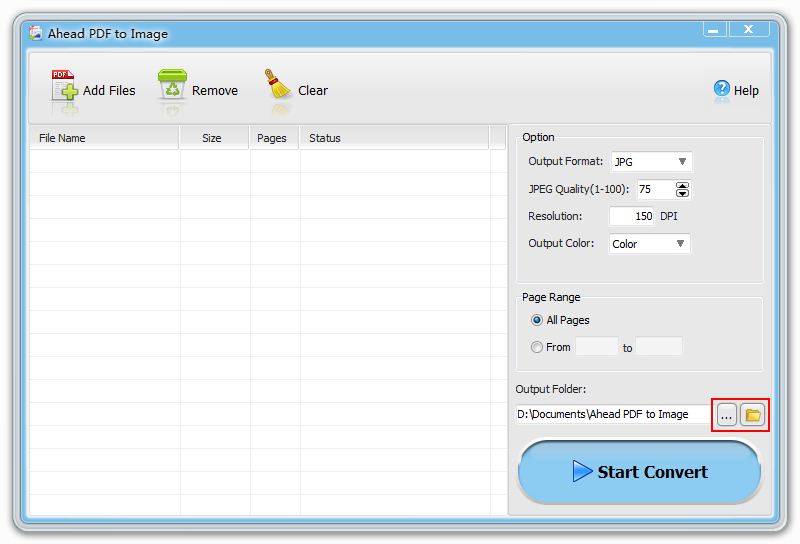
If you want to specify an output folder for the image files, please click the "…" button to specify a folder.
Tips:
You can click  button to open the specified output folder.
Step 5: Convert PDF to image files
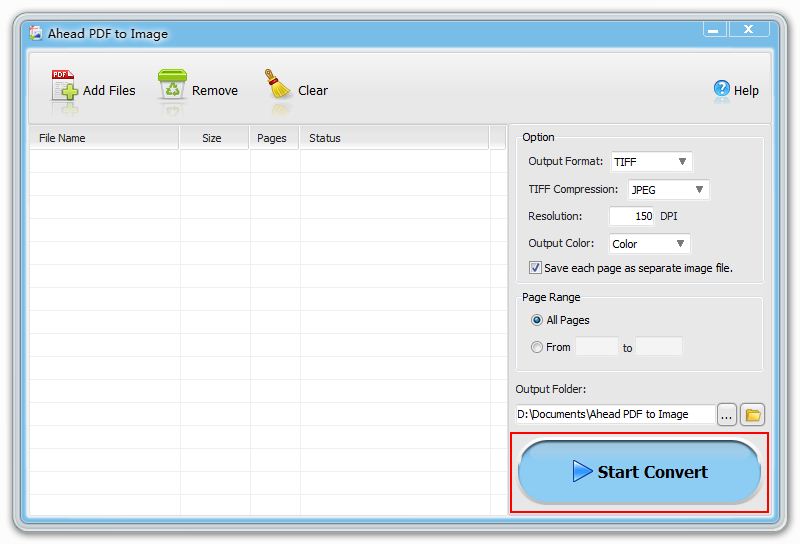
Click "Start Convert" to convert PDF files.
Tips:
During the conversion process, the "Start Convert" button will change to a "Stop" button, you can click the "Stop" button to stop the process.
Step 6: Open the generated image files
There are two methods for you to open the generated image files.
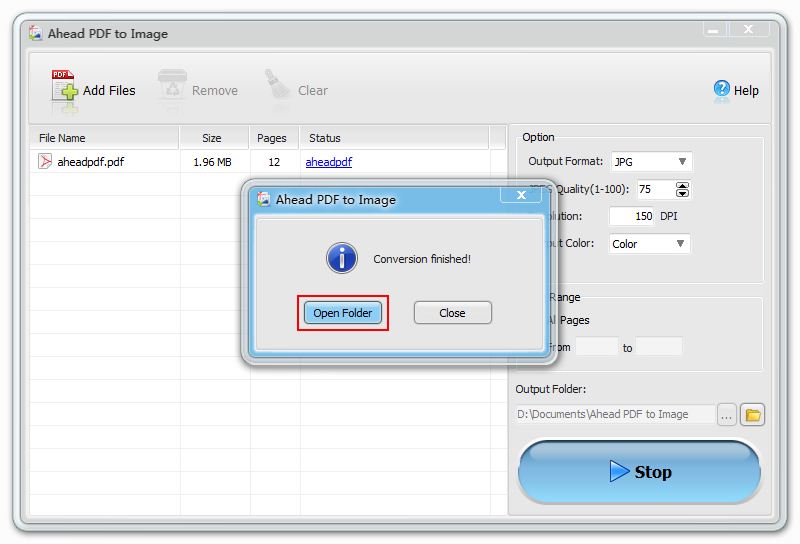
1. After processing is complete, it will display the following screen. Click the "Open Folder" button to open the output folder, then you can open image files.
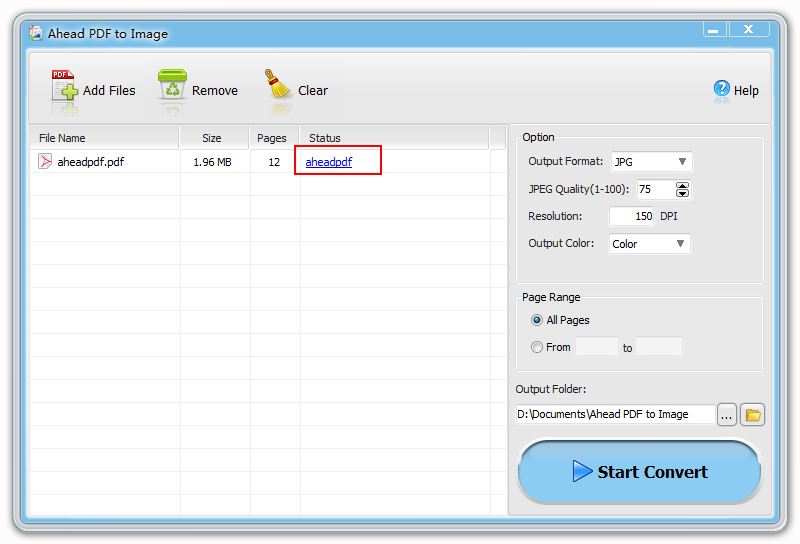
2. After processing is complete, the folder of output image files will be displayed in the Status column, and you can click it to open the output folder.
Ready to try or buy
